✓ Always test cleaning solutions on an inconspicuous area first.
✓ Avoid using harsh chemicals or abrasive materials on oil paintings.
✓ Dust regularly with a soft, dry brush to prevent buildup.
✓ Professional restoration is recommended for significant damage or valuable pieces.
How It Works
1
Assess the Painting's Condition
Before any cleaning, carefully examine your oil painting for flaking paint, cracks, or fragile areas. This initial assessment will help you determine the appropriate cleaning method and identify potential risks.
2
Gather Your Gentle Supplies
Collect soft brushes, distilled water, cotton swabs, and a mild, pH-neutral soap specifically designed for art. Ensure all tools are clean and free from any residues that could harm the artwork.
3
Perform a Spot Test
Apply your chosen cleaning agent to a tiny, hidden corner of the painting, like the very edge or a dark area. Wait a few minutes to observe any adverse reactions before proceeding with wider cleaning.
4
Clean Methodically and Gently
Work in small sections, using a light touch and minimal moisture. Avoid scrubbing or applying excessive pressure, and change your cleaning materials frequently to prevent redepositing dirt.
Understanding Your Oil Painting: A Foundation for Cleaning
Photo: Steve A Johnson / Pexels
Before you even think about reaching for a cleaning solution, it's crucial to understand the intricate nature of an oil painting. Unlike other art forms, oil paintings are complex layered structures, often comprising a support (canvas, wood panel), a ground layer, multiple layers of oil paint, and sometimes a varnish layer. Each of these components can react differently to cleaning agents and environmental factors. The age of the painting plays a significant role; older paintings, especially those from the 19th century or earlier, may have brittle paint layers, delicate varnishes, or even previous restoration attempts that could be compromised by improper cleaning. Modern oil paintings, while generally more robust, can still suffer damage from harsh chemicals or abrasive techniques. Understanding the artist's materials is also key. Some artists used thinner paint layers, while others applied thick impasto. The type of oil used (linseed, walnut, poppy) and the pigments can also influence how the paint ages and reacts to cleaning. For instance, certain pigments can become more fragile over time or react chemically with cleaning agents, leading to discoloration or paint loss. Learning about art preservation techniques extends beyond just cleaning. It involves understanding environmental controls like humidity and temperature, proper handling, and suitable framing. A stable environment is the first line of defense against deterioration, minimizing the need for frequent or intensive cleaning. High humidity can cause canvas to slacken and paint to blister, while very dry conditions can lead to cracking. Fluctuating temperatures exacerbate these issues. Therefore, before embarking on any cleaning endeavor, take a moment to assess not just the dirt on the surface, but the overall health of the painting. Look for signs of flaking paint, cracks that extend through the paint layers to the support, or areas where the varnish has discolored or become cloudy. These signs indicate that a professional conservator might be needed, as DIY cleaning could inadvertently worsen the damage. This foundational understanding will guide your approach, ensuring that your cleaning efforts are both effective and safe for your valuable artwork. Remember, the goal is not just to remove dirt, but to preserve the integrity and longevity of the painting for generations to come.
Essential Tools and Gentle Cleaning Solutions
Photo: Negative Space / Pexels
When it comes to how to clean oil paintings at home, selecting the right tools and solutions is paramount. Your arsenal should be gentle, non-abrasive, and specifically chosen to minimize risk to the artwork. Start with a selection of very soft brushes – cosmetic brushes, a soft watercolor brush, or even a very fine, clean sable brush are ideal for dusting. These brushes should be completely dry and never used for painting or other tasks that could transfer oils or residues. For surface cleaning, you'll need high-quality cotton swabs (Q-tips are often too loosely packed; opt for tightly wound, lint-free cotton swabs) and distilled water. Distilled water is crucial because tap water contains minerals and impurities that can leave deposits or react negatively with the paint or varnish. In some cases, a mild, pH-neutral soap specifically formulated for art conservation might be used, but this should be approached with extreme caution and only after extensive research and testing. Never use household cleaners, window cleaner, furniture polish, or any solvent not explicitly approved for art restoration. These products contain harsh chemicals, abrasives, or oils that can irreversibly damage the paint, dissolve varnish, or embed themselves into the artwork, causing long-term deterioration. For more stubborn grime, some conservators use a solution of saliva (yes, human saliva contains enzymes that can break down dirt without harming paint), but this is a highly specialized technique that requires careful application and understanding of its properties. For the average homeowner, sticking to dry dusting and very gentle distilled water cleaning is the safest bet. Always have a clean, soft cloth (microfiber is excellent) handy for blotting excess moisture. A magnifying glass can also be incredibly useful for inspecting the painting up close, both before and during the cleaning process, to identify delicate areas or assess the effectiveness of your cleaning. Remember, less is more when cleaning oil paintings. The goal is to remove surface dirt and grime, not to strip away varnish or original paint. If in doubt, always err on the side of caution and consult with a professional conservator. Investing in proper, museum-grade cleaning supplies, even for at-home use, is a small price to pay to protect your valuable art.
Step-by-Step Guide to Safely Cleaning Your Oil Painting
Photo: ROMAN ODINTSOV / Pexels
Once you've understood the basics and gathered your supplies, you can proceed with cleaning your oil painting. Remember, patience and a light touch are your best allies. First, ensure your workspace is clean, well-lit, and stable. Lay the painting flat on a clean, soft surface, like a blanket or towel, to prevent accidental damage.
**Step 1: Dry Dusting.** Begin by gently dusting the entire surface of the painting with a very soft, dry brush. Work from top to bottom, using light, feathery strokes. The goal is to remove loose dust, cobwebs, and superficial debris without applying any pressure that could scratch or dislodge paint. Pay special attention to textured areas where dust tends to accumulate. This step is crucial and should be done regularly, even if you don't plan a deeper clean, as it prevents dirt from embedding itself into the varnish or paint layers.
**Step 2: Spot Testing.** This is arguably the most critical step. Dip a cotton swab (tightly wound and lint-free) into distilled water, then gently blot it almost dry on a clean cloth. The swab should be barely damp. Choose a tiny, inconspicuous area on the painting – perhaps an extreme edge, a dark corner, or an area that is not central to the composition. Gently roll the damp swab over this small area. Observe the swab for any color transfer (indicating paint removal) or any change in the painting's appearance (e.g., dulling, streaking). If you see any paint coming off or any adverse reaction, STOP immediately. This particular cleaning method is not suitable for your painting, and you should seek professional advice. If the swab remains clean and the painting shows no ill effects, you can cautiously proceed. Professional art conservation should always be considered for valuable or delicate pieces.
**Step 3: Gentle Surface Cleaning (if spot test is successful).** Working in very small sections (no larger than an inch or two at a time), gently roll a barely damp cotton swab over the surface of the painting. Do not scrub. The motion should be light and controlled, lifting dirt rather than pushing it around. As soon as the swab shows any sign of dirt, discard it and use a fresh, barely damp swab. This is essential to avoid redepositing grime. Never use the same swab for more than a single pass or a tiny area. You will likely go through many cotton swabs.
**Step 4: Blotting and Drying.** After cleaning a small section, immediately follow with a clean, dry cotton swab or a corner of a soft, lint-free cloth to gently blot any residual moisture. Ensure the area is completely dry before moving to an adjacent section. Do not allow water to sit on the surface of the painting for any length of time.
**Step 5: Repeat and Evaluate.** Continue this process, section by section, gradually cleaning the entire painting. Take frequent breaks to step back and assess your progress. Look for an even clean and ensure there are no streaks or missed spots. Be incredibly mindful around areas of flaking paint or visible cracks; avoid these areas altogether if possible.
**Step 6: Final Inspection.** Once the entire painting is dry, perform a final inspection under good lighting. Look for any areas that might require a very light second pass or any signs of accidental damage. Remember, the goal is improvement, not perfection, and certainly not damage. If the dirt is deeply embedded or the varnish is significantly discolored, a professional conservator is the only safe option.
Common Mistakes to Avoid and When to Call a Professional
Photo: Tima Miroshnichenko / Pexels
Cleaning an oil painting at home can be rewarding, but it’s fraught with potential pitfalls if not approached with caution. Avoiding common mistakes is just as important as knowing the correct techniques.
**Common Mistakes to Avoid:**
* **Using Abrasive Materials:** Never use paper towels, rough cloths, or sponges. These can scratch the delicate surface or leave fibers embedded in the paint. Only use soft, lint-free cotton or microfiber.
* **Applying Too Much Pressure:** Scrubbing or pressing too hard can lift paint, damage the varnish, or create irreversible streaks. Your touch should be as light as possible.
* **Using Household Cleaners:** This cannot be stressed enough. Products like Windex, furniture polish, dish soap, or even harsh art solvents not specifically designed for conservation are highly detrimental. They contain chemicals that can dissolve paint, cause discoloration, or leave harmful residues.
* **Excessive Moisture:** Allowing water to pool on the surface or using overly wet swabs can cause water damage, swelling of the canvas, or even mold growth. Always use barely damp materials and blot dry immediately.
* **Ignoring Flaking or Cracking Paint:** Attempting to clean areas with unstable paint will almost certainly lead to further loss. These areas require the expertise of a conservator.
* **Cleaning Without a Spot Test:** Skipping the spot test is a gamble you cannot afford to take. Every painting is unique, and what works for one may ruin another.
* **Trying to Remove Varnish:** Stripping old, discolored varnish is a highly specialized process that requires specific solvents and expert knowledge. Attempting this at home will almost certainly damage the underlying paint layers.
**When to Call a Professional Conservator:**
While this guide provides methods for how to clean oil paintings at home, there are definitive signs that indicate professional intervention is necessary. If your painting exhibits any of the following, put down your cotton swabs and seek expert help:
* **Flaking, blistering, or lifting paint:** These are signs of structural instability that require consolidation by a conservator.
* **Deep or extensive cracking:** While some cracking (craquelure) is natural with age, deep cracks that expose the canvas or panel can be vulnerable to damage from cleaning.
* **Significant discoloration or yellowing of varnish:** Removing old, oxidized varnish requires specific solvents and techniques to prevent damage to the paint underneath.
* **Mold or mildew growth:** These biological growths require specialized treatment to stop their spread and remove them without harming the artwork.
* **Tears, holes, or punctures in the canvas:** Structural damage requires professional repair.
* **Smoke or fire damage:** Soot and smoke residue require specific cleaning agents and methods that are best handled by experts.
* **If the painting is historically significant or highly valuable:** The risk of irreversible damage outweighs the benefits of DIY cleaning. A professional conservator is trained to assess, clean, and restore artworks with minimal risk, preserving both their aesthetic and monetary value. Remember, a conservator's goal is to preserve the integrity of the artwork, not just to make it look clean. They have the knowledge, tools, and experience to safely address complex issues that are beyond the scope of home cleaning.
Comparison
Feature
DIY Gentle Cleaning
Professional Conservation
Harsh Household Cleaners
Risk of Damage
Low (if done correctly)
Very Low (expert knowledge)
Very High (irreversible)
Cost
Very Low (supplies only)
High (specialized service)
Low (already owned)
Effectiveness (Surface Dirt)
Good
Excellent
Variable (often damaging)
Varnish Removal
✗
✓
✗ (damaging attempt)
Paint Stabilization
✗
✓
✗
Required Skill Level
Moderate (requires patience)
Expert
Low (but dangerous)
Suitable For
Light dust, surface grime
All conditions, valuable art
None (for oil paintings)
What Readers Say
★★★★★
"I was so nervous to clean my grandmother's old oil painting, but this guide on how to clean oil paintings at home made it feel manageable. The step-by-step instructions for dry dusting and using distilled water were incredibly clear, and the spot test saved me from a potential disaster. My painting looks so much brighter now!"
Eleanor V. · Boston, MA
★★★★★
"The advice on avoiding household cleaners was a lifesaver. I almost used a common spray cleaner, but after reading this, I stuck to the gentle methods. The results were fantastic; the colors are vibrant again without any damage."
Marcus P. · Dallas, TX
★★★★★
"This article gave me the confidence to tackle a dusty landscape painting. Following the instructions for using cotton swabs and distilled water meticulously, I managed to remove years of grime. The painting now has a clarity I hadn't seen in ages, truly a remarkable improvement."
Sophia L. · Seattle, WA
★★★★★
"While the guide on how to clean oil paintings at home was very helpful for surface dirt, my painting had some flaking paint that I wisely left untouched. It's a great resource for basic cleaning, but it correctly emphasized when to call a professional for more serious issues."
David R. · Miami, FL
★★★★★
"As an amateur artist, I found the section on understanding oil painting layers particularly insightful. It really helped me appreciate the delicate nature of the artwork and approach the cleaning process with the respect it deserves. My own older practice pieces cleaned up beautifully."
Jessica T. · Denver, CO
Frequently Asked Questions
What is the safest way to clean an old, dusty oil painting at home?
The safest method for cleaning an old, dusty oil painting at home involves dry dusting with a very soft, clean brush to remove loose debris, followed by extremely gentle surface cleaning using barely damp, lint-free cotton swabs and distilled water. Always perform a spot test on an inconspicuous area first, and never use household cleaners or excessive moisture.
Can I use Windex or other household cleaners on my oil painting?
Absolutely not. Household cleaners like Windex, furniture polish, or dish soap contain harsh chemicals, ammonia, or abrasives that can irreversibly damage the paint layers, dissolve varnish, cause discoloration, or leave harmful residues on your oil painting. Always use materials specifically recommended for art conservation or stick to distilled water.
How often should I clean my oil paintings?
For general maintenance, dry dusting with a soft brush should be done regularly, perhaps every few months, to prevent dust buildup. A deeper surface clean with distilled water should only be performed when noticeable grime or dullness affects the painting's appearance, and only after a successful spot test. Avoid over-cleaning, as even gentle methods can cause cumulative wear.
Is it expensive to have an oil painting professionally cleaned?
The cost of professional oil painting cleaning and restoration can vary widely depending on the size, condition, and complexity of the damage. While it can be a significant investment, for valuable, antique, or sentimentally important pieces, the expertise of a conservator is often invaluable to ensure the artwork's long-term preservation and value. Always obtain quotes from reputable conservators.
How does professional cleaning differ from home cleaning methods?
Professional conservators possess specialized knowledge of art materials, chemistry, and conservation ethics. They use advanced techniques, specific solvents, and controlled environments to safely remove grime, discolored varnish, repair structural damage, and stabilize paint. Home cleaning is limited to superficial dirt removal and cannot address complex issues like varnish removal, paint consolidation, or structural repairs, which require expert intervention.
Who should attempt to clean an oil painting at home?
Home cleaning of oil paintings is best suited for individuals with paintings that exhibit only light surface dust or very minor, superficial grime, who are patient, meticulous, and willing to follow strict, gentle guidelines. It's ideal for less valuable pieces or those where the risk of professional cleaning cost outweighs the painting's value, but always with extreme caution.
Are there any risks associated with cleaning oil paintings at home?
Yes, there are significant risks, including scratching the paint surface, dissolving or dulling the varnish, lifting paint layers, causing discoloration, introducing moisture damage, or embedding dirt further into the surface. These risks are why thorough preparation, gentle methods, and a crucial spot test are absolutely essential before attempting any home cleaning.
What are the emerging trends in oil painting conservation for future care?
Future trends in oil painting conservation focus on less invasive techniques, advanced material science for more stable and reversible restoration materials, and the use of non-contact cleaning methods like lasers for specific types of grime. There's also a growing emphasis on preventative conservation through environmental control and digital documentation, reducing the need for physical intervention.
Mastering how to clean oil paintings at home can be a deeply satisfying endeavor, allowing you to connect with and preserve your cherished art. By following these gentle, expert-backed methods, you can safely restore vibrancy and extend the life of your oil paintings, ensuring their beauty endures for years to come. Start your art preservation journey with confidence today.

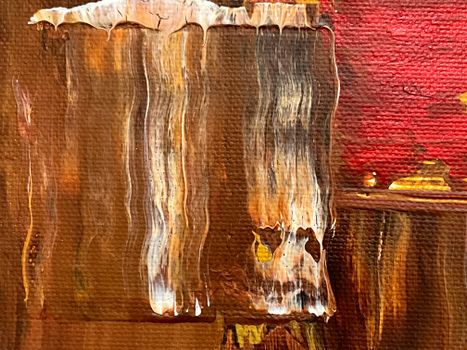 Photo: Steve A Johnson / Pexels
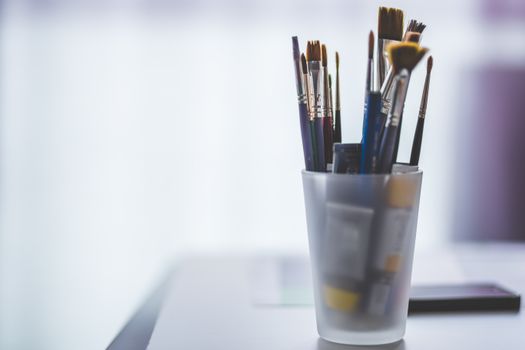 Photo: Negative Space / Pexels
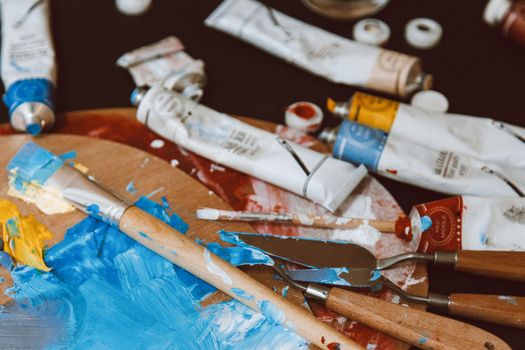 Photo: ROMAN ODINTSOV / Pexels
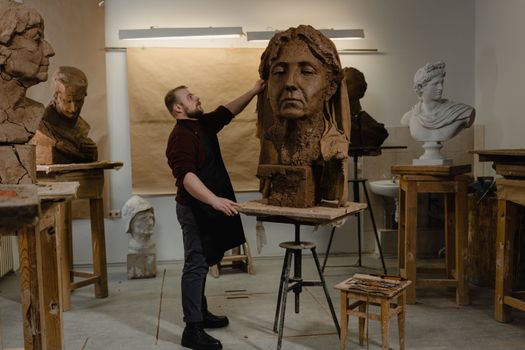 Photo: Tima Miroshnichenko / Pexels