✓ Always test cleaning solutions on an inconspicuous area first.
✓ Avoid using harsh chemicals or abrasive materials.
✓ Professional restoration is recommended for valuable or damaged art.
✓ Regular, gentle dusting prevents dirt buildup.
✓ Humidity and temperature control are crucial for preservation.
How It Works
1
Assess the Painting's Condition
Before any cleaning, carefully examine the painting for cracks, flaking paint, or unstable areas. This initial assessment guides your approach and helps prevent further damage.
2
Gentle Surface Dusting
Use a soft, natural-bristle brush or a clean, dry microfiber cloth to delicately remove loose dust and cobwebs from the painting's surface. Always work with light, sweeping motions.
3
Spot Test Cleaning Solutions
If deeper cleaning is needed, prepare a mild solution and apply a tiny amount to a hidden edge or border of the painting. Observe for any adverse reactions before proceeding.
4
Careful Dirt Removal
Using cotton swabs or balls slightly dampened with your tested solution, gently roll them across small sections of the painting. Replace swabs frequently to avoid redepositing dirt.
Understanding the Delicate Nature of Oil Paintings and When to Clean
Photo: DΛVΞ GΛRCIΛ / Pexels
Oil paintings are more than just decorative pieces; they are historical artifacts, personal expressions, and often significant investments. Their longevity and vibrancy depend heavily on proper care and, when necessary, careful cleaning. Unlike modern prints or acrylics, oil paint layers, often built up over time, can be surprisingly fragile, especially as they age. The canvas or panel support, the ground layers, and the paint itself all react differently to environmental factors and cleaning agents. Understanding this inherent delicacy is the first, most crucial step before you even consider how to clean oil paintings.
Dirt, grime, smoke residue, and even household pollutants can accumulate on the surface of an oil painting, dulling its colors and obscuring details. Over time, these contaminants can chemically react with the paint and varnish layers, leading to irreversible damage. However, not every speck of dust warrants a full cleaning. Aggressive or frequent cleaning can cause more harm than good, abrading the paint surface, dissolving the protective varnish, or even lifting paint entirely. The key is to assess when cleaning is truly necessary and when simple dusting suffices.
Signs that your oil painting might need a deeper clean include a noticeable yellowing or darkening of the varnish layer, a dulling of colors that once appeared vibrant, or a visible film of dirt or soot. If the painting is heavily discolored by smoke, nicotine, or significant atmospheric pollution, professional intervention is almost always recommended. For minor surface dust or light grime, a gentle, at-home approach might be feasible, but caution is paramount. Never attempt to clean a painting that shows signs of flaking, cracking, or unstable paint, as any liquid or friction could cause irreparable damage. In such cases, consulting a professional art conservator is the only safe course of action. They possess the specialized knowledge, tools, and materials to stabilize and clean delicate artworks without causing further deterioration. Remember, the goal of cleaning is preservation, not just aesthetic improvement. A well-intentioned but ill-informed cleaning attempt can drastically reduce a painting's value and lifespan. For more insights on general art care, visit our guide on preserving your art collection.
The age of the painting also plays a significant role in determining the appropriate cleaning method. Newer paintings (those less than 50-70 years old) might have more stable paint films and modern varnishes that are less susceptible to certain solvents. Older, antique paintings, however, often feature brittle paint, natural resin varnishes that become increasingly insoluble and yellow over time, and supports that have weakened. These require an even more delicate touch and often necessitate professional expertise. Always prioritize the long-term health of the artwork over immediate cosmetic improvement. If you are unsure, err on the side of caution and seek expert advice. This foundational understanding will empower you to approach the task of cleaning your oil paintings with the respect and care they deserve.
Essential Tools and Gentle Techniques for Surface Cleaning
Photo: www.kaboompics.com / Pexels
Once you've determined that your oil painting is stable enough for a surface clean, gathering the correct tools and understanding gentle techniques are crucial steps in how to clean oil paintings effectively and safely. The right equipment minimizes risk, while proper technique prevents accidental damage. First and foremost, you will need a well-lit, clean, and stable workspace. Ensure there's no risk of accidental bumps or spills.
For basic dusting, a very soft, natural-bristle brush is indispensable. Opt for a high-quality artist's brush, a soft cosmetic brush, or even a very fine, clean watercolor brush. The key is that the bristles are soft enough not to scratch the delicate paint surface, yet firm enough to dislodge loose dust. Alternatively, a clean, dry microfiber cloth can be used for very smooth, stable surfaces, but always ensure it's lint-free. Avoid feather dusters, as they can redistribute dust and even scratch the surface with their quills. When dusting, hold the brush or cloth lightly and use gentle, sweeping motions, always working from the top down. Do not press hard or rub; the goal is to lift dust, not to scrub.
If deeper cleaning is required for light grime or surface film, you will need distilled water, cotton swabs (Q-tips), and potentially a very mild, pH-neutral soap or a specialized art cleaning solution. Never use tap water, as it contains minerals and chemicals that can leave residues or react adversely with the paint. Distilled water is pure and safe. When selecting cotton swabs, choose high-quality ones with tightly wound cotton tips that won't leave fibers behind. You'll need a large supply, as each swab should only be used for a small area and then discarded.
Before applying any liquid, always, always perform a spot test. Choose an inconspicuous area, such as a corner near the frame or an area of dark, stable paint. Dampen a cotton swab with distilled water (or your chosen solution) and gently roll it over a tiny section. Observe for any color lift, dulling, or adverse reactions. If the cotton swab shows color from the painting, stop immediately. This indicates the paint or varnish is unstable or soluble, and further cleaning should only be attempted by a professional. If the test area remains unchanged and the swab shows only dirt, you can proceed with extreme caution.
When cleaning, work in small sections. Lightly dampen a fresh cotton swab with the distilled water or solution – it should be barely moist, not dripping. Gently roll the swab across a small area, approximately 1-2 square inches. Do not rub back and forth. The rolling motion lifts the dirt onto the swab. As soon as the swab shows dirt, discard it and use a new one. This prevents redepositing grime. Repeat this process, gradually cleaning the entire surface. Have a second set of swabs dampened with plain distilled water to lightly go over the cleaned area, rinsing off any residue from the cleaning solution. Finally, use dry swabs to gently blot away any excess moisture. Patience is key; this process can be time-consuming but ensures the safety of your precious artwork. For advanced restoration techniques, explore resources on historic art preservation.
Advanced Cleaning Considerations: Varnish Removal and Professional Help
Photo: Annushka Ahuja / Pexels
When simple surface cleaning isn't enough, understanding the complexities of varnish removal and recognizing when to seek professional help becomes paramount in how to clean oil paintings effectively and safely. Varnish is applied to oil paintings for two primary reasons: to protect the paint layers from dirt, dust, and environmental pollutants, and to unify the painting's appearance, often enhancing color saturation and depth. Over decades, natural resin varnishes (like dammar or mastic) can yellow, darken, and become brittle, significantly altering the painting's original colors and aesthetic. This yellowing is often mistaken for ingrained dirt, but it's the varnish itself that has discolored. Synthetic varnishes, developed more recently, tend to be more stable but can still accumulate grime.
Removing old, discolored varnish is a highly specialized process that should almost never be attempted by an untrained individual. It involves the careful application of specific solvents, each chosen for its ability to dissolve the varnish without affecting the underlying paint. The choice of solvent depends on the type of varnish, its age, and the stability of the oil paint beneath. Even professional conservators approach this task with extreme caution, often using microscopic analysis to determine the precise layers and their solubilities. Incorrect solvent use can irreversibly damage the paint, causing it to swell, lift, or even dissolve. Furthermore, some solvents are highly toxic and require proper ventilation and protective gear.
Signs that your painting might need varnish removal include a significant overall yellowing that obscures details, a dull, hazy appearance despite surface cleaning, or a marked difference in color vibrancy between a protected area (e.g., under a frame rebate) and the exposed surface. If you observe these symptoms, it's a strong indicator that the painting requires professional attention. A qualified art conservator will not only assess the varnish but also the overall condition of the paint, the ground layers, and the support. They will conduct meticulous tests to identify the varnish type and determine the safest, most effective solvent system. The process often involves working under magnification, using tiny cotton swabs to meticulously remove the varnish layer by layer, sometimes over many hours or even days.
Beyond varnish removal, professional conservators can address a myriad of other issues, such as repairing tears in the canvas, consolidating flaking paint, filling losses, and inpainting (retouching) areas where paint is missing. These interventions require an deep understanding of art materials, chemistry, and ethical restoration practices. The goal is always to stabilize the artwork and restore its aesthetic integrity while maintaining its historical authenticity. They can also re-varnish the painting with a stable, reversible synthetic resin varnish that will protect it for future generations and is less prone to yellowing. Investing in professional conservation for valuable or cherished oil paintings is an investment in their long-term survival and continued enjoyment. Never underestimate the complexity of these processes; when in doubt, always consult an expert. Their expertise is invaluable in preserving artistic heritage.
Preventative Care and Common Mistakes to Avoid When Cleaning Oil Paintings
Photo: Huy Nguyễn / Pexels
Understanding how to clean oil paintings isn't just about the act of cleaning; it’s also about implementing preventative care to minimize the need for invasive procedures and avoiding common pitfalls that can lead to irreversible damage. Proactive measures are always preferable to reactive restoration. One of the most critical aspects of preventative care is controlling the environment where your oil painting is displayed and stored.
**Environmental Control:** Oil paintings thrive in stable environments. Aim for a consistent temperature between 68-72°F (20-22°C) and a relative humidity of 45-55%. Fluctuations in temperature and humidity cause the canvas, wood panel, and paint layers to expand and contract, leading to cracking, flaking, and warping. Avoid hanging paintings near direct sunlight, heat sources (fireplaces, radiators), or in damp areas (bathrooms, basements). UV light from direct sunlight can fade pigments and degrade varnish over time. Proper framing, including a protective backing, can also offer some defense against environmental changes and physical damage.
**Regular Dusting:** As mentioned earlier, routine, gentle dusting is your first line of defense. Using a soft, natural-bristle brush, lightly dust the surface every few weeks or months. This prevents dust and pollutants from building up and bonding with the varnish, making deeper cleaning less frequently necessary. Always handle the painting by its frame or stretcher bars, never by the canvas itself, as oils from your hands can leave residues and the canvas is delicate.
**Common Mistakes to Avoid:**
* **Using Household Cleaners:** Never, under any circumstances, use household cleaning products like Windex, furniture polish, or abrasive cleaners on an oil painting. These products contain harsh chemicals, ammonia, or solvents that can instantly dissolve varnish, lift paint, or leave permanent, damaging residues.
* **Rubbing Too Hard:** Aggressive rubbing can physically abrade the paint layers, removing original pigment and texture. Always use gentle, rolling motions with cotton swabs.
* **Saturating the Surface:** Applying too much liquid can cause moisture to seep into cracks, weakening the canvas or panel and potentially causing mold growth or damage to the paint layers.
* **Ignoring Flaking Paint:** Attempting to clean a painting with flaking or unstable paint will only worsen the problem. Any friction or liquid will cause more paint to detach. This is a clear signal for professional intervention.
* **Using Spit:** While historically some conservators used saliva for very specific, controlled cleaning, it is not a recommended at-home method. Saliva contains enzymes and bacteria that can introduce contaminants and potentially damage the artwork.
* **Improper Storage:** If storing paintings, ensure they are in a climate-controlled area, ideally upright, protected by breathable materials like archival tissue paper and a sturdy box. Avoid plastic wraps that can trap moisture.
By adhering to these preventative measures and avoiding common mistakes, you significantly reduce the risk of damage and extend the life and beauty of your cherished oil paintings. When in doubt, always err on the side of caution and consult an art conservator. Their expertise is invaluable for preserving these irreplaceable pieces.
Comparison
Feature
DIY Surface Cleaning
Professional Restoration
Household Cleaners
Water-Only Wipe
Effectiveness on Surface Dirt
Good
Excellent
Potentially damaging
Limited
Effectiveness on Yellowed Varnish
None
Excellent
Damaging
None
Risk of Damage
Low (if careful)
Very Low (expert)
Extremely High
Low (if distilled)
Cost
Low
High
Low (but high risk)
Very Low
Required Expertise
Basic
High
None (but dangerous)
Basic
Recommended for Valuables
✗
✓
✗
✗
What Readers Say
★★★★★
"This guide on how to clean oil paintings was incredibly thorough and reassuring. I used the gentle dusting method on a family heirloom and the colors instantly looked brighter without any risk. The detailed warnings about what not to do were especially helpful."
Eleanor Vance · Boston, MA
★★★★★
"I had a painting with some light grime and was terrified to touch it. Following the step-by-step instructions for spot testing and gentle swab cleaning gave me the confidence to proceed. The results were fantastic, and I felt completely in control of the process."
Marcus Chen · Los Angeles, CA
★★★★★
"The information on when to call a professional was a game-changer. I realized my antique painting needed more than just surface cleaning due to severe varnish yellowing. I contacted a conservator as suggested, and the painting now looks incredible, truly restored."
Sarah Miller · Dallas, TX
★★★★★
"A very comprehensive article. I appreciated the emphasis on preventative care, which I hadn't considered enough before. While I didn't attempt a deep clean myself, the advice on environmental control has already made a difference in how I display my art."
David Rodriguez · Chicago, IL
★★★★★
"As a budding artist, understanding how to clean oil paintings properly is crucial for my own work's longevity. This guide provided invaluable insights into material stability and safe practices. It's a must-read for anyone serious about art preservation."
Jessica Lee · Miami, FL
Frequently Asked Questions
What is the safest way to clean an oil painting at home?
The safest way to clean an oil painting at home involves gentle dusting with a soft, natural-bristle brush to remove loose surface dirt. For light grime, a spot-tested method using cotton swabs barely dampened with distilled water, applied with a gentle rolling motion, can be effective. Always prioritize caution and stop if any color transfers to the swab.
Can I use Windex or other household cleaners on my oil painting?
Absolutely not. Never use Windex, furniture polish, or any other household cleaners on an oil painting. These products contain harsh chemicals, ammonia, or solvents that can cause irreversible damage, such as dissolving varnish, lifting paint, or leaving permanent residues that degrade the artwork over time.
How often should I clean my oil painting?
Oil paintings generally do not need frequent deep cleaning. Gentle dusting can be done every few weeks or months to prevent buildup. Deeper cleaning should only be undertaken when there's a noticeable accumulation of grime or a dulling of colors, and only after careful assessment and spot testing. Over-cleaning can be more damaging than leaving minor dirt.
Is professional oil painting restoration expensive?
The cost of professional oil painting restoration can vary widely depending on the size, age, condition, and complexity of the damage or cleaning required. While it can be a significant investment, it's often essential for preserving valuable or cherished artworks and is generally considered worthwhile to prevent further degradation and maintain the painting's value and aesthetic integrity.
How does cleaning an oil painting differ from cleaning an acrylic painting?
Cleaning an oil painting differs significantly from cleaning an acrylic painting due to the distinct chemical properties of the paints and varnishes. Oil paint, especially when aged, can be brittle and susceptible to certain solvents, while acrylics are generally more flexible and less reactive. Acrylics can often be cleaned more robustly with mild soap and water, whereas oil paintings require much more delicate, specific methods and often specialized solvents for varnish removal.
Who should clean a very old or valuable oil painting?
A very old or valuable oil painting should always be cleaned by a professional art conservator or restorer. These individuals possess specialized training, knowledge of art chemistry, and access to specific tools and materials to safely assess, clean, and restore delicate artworks without causing damage, ensuring the longevity and integrity of the piece.
What are the risks of attempting to clean a valuable oil painting myself?
The risks of attempting to clean a valuable oil painting yourself are high and include irreversible damage such as paint loss, discoloration, abrasion of the paint surface, dissolution of original varnish, or introduction of harmful chemicals. Improper cleaning can drastically reduce the painting's monetary and historical value, and its overall lifespan.
Are there new technologies or methods emerging for cleaning oil paintings?
Yes, art conservation is a continually evolving field. Researchers are developing new, highly selective cleaning methods, such as laser cleaning for specific types of grime or pollutants, and improved solvent gels or emulsions that offer greater control over solvent penetration. These advanced techniques aim to be even safer and more precise, minimizing intervention while maximizing effectiveness for delicate artworks.
Armed with this comprehensive knowledge, you're now better equipped to approach how to clean oil paintings with confidence and care. Remember, patience, precision, and knowing when to call a professional are your greatest assets in preserving these timeless treasures. Start protecting your art today!

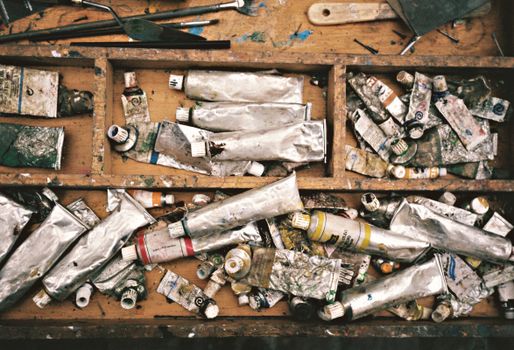 Photo: DΛVΞ GΛRCIΛ / Pexels
 Photo: www.kaboompics.com / Pexels
 Photo: Annushka Ahuja / Pexels
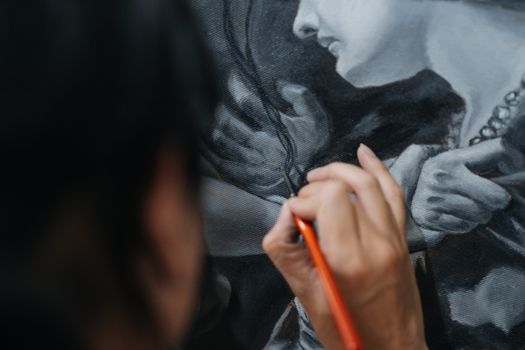 Photo: Huy Nguyễn / Pexels