Mastering Realistic Portraits: Your Ultimate Guide
how to draw realistic portraits

Mastering Realistic Portraits: Your Ultimate Guide

Transform your drawing skills to capture lifelike expressions and incredible detail in every portrait you create.

Start Your Masterpiece

Key Takeaways

  • ✓ Understanding human anatomy is crucial for realistic proportions.
  • ✓ Light and shadow are fundamental in creating depth and form.
  • ✓ Practice observing subtle nuances in facial features.
  • ✓ Patience and layering are key to achieving smooth transitions and textures.

How It Works

1
Foundation: Proportions & Structure

Begin by understanding the basic skull structure and average facial proportions. This initial framework ensures your portrait has a solid, accurate base before adding details.

2
Form: Light, Shadow & Value

Learn to see and render light and shadow patterns to create three-dimensional form. Mastering value ranges brings your portrait to life, giving it depth and realism.

3
Refinement: Features & Texture

Focus on individual features like eyes, nose, and mouth, paying attention to their unique shapes and textures. Layering and blending techniques will help achieve smooth skin tones and intricate hair.

4
Expression: Emotion & Likeness

Capture the subtle expressions and unique characteristics that make each individual distinct. This final stage is where your portrait truly embodies the person you're drawing.

Understanding Facial Anatomy and Proportions for Realistic Portraits
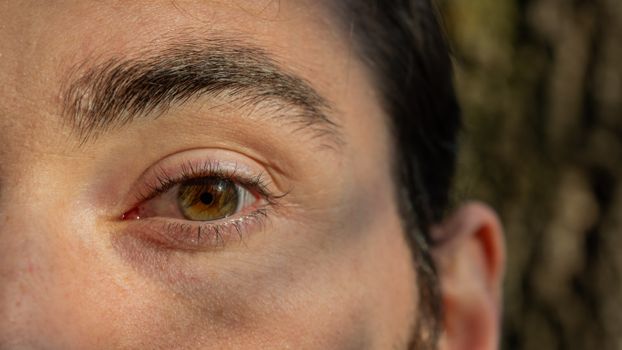
Detailed close-up of a human eye with brown iris reflecting natural light. Photo: Mustafa Alkan / Pexels
Embarking on the journey of how to draw realistic portraits begins with a deep dive into the very structure that underpins every face: anatomy and proportions. Without a solid grasp of these fundamentals, even the most detailed rendering will fall short of true realism. Think of the skull as the foundational architecture upon which all other features are built. Understanding its shape, the placement of the eye sockets, nasal cavity, and jawline provides an invaluable skeletal map. Many aspiring artists rush past this crucial stage, eager to jump into rendering eyes or hair, but this impatience often leads to distorted or unconvincing results. The classic approach often involves the 'Loomis Method' or similar proportional systems, which offer a standardized way to map out the face. These methods typically divide the face into thirds: from the hairline to the brow, from the brow to the base of the nose, and from the base of the nose to the chin. While these are excellent starting points, it's vital to remember that they are guidelines, not rigid rules. Every individual possesses unique variations, and your ability to observe and adapt to these differences is what truly elevates a portrait from generic to genuinely lifelike. For instance, the distance between the eyes is typically one eye-width, and the corners of the mouth often align with the pupils. However, these averages can shift depending on ethnicity, age, and even specific facial expressions. Beyond basic measurements, consider the planes of the face. The face isn't a flat surface; it's a complex arrangement of convex and concave forms. The forehead, cheekbones, nose bridge, and chin each present distinct planes that interact with light differently. Practicing drawing the head from various angles—front, profile, three-quarter view—helps you internalize these three-dimensional forms. Don't be afraid to use reference materials, including anatomical diagrams, to truly understand the underlying muscle structure. Knowing where muscles attach and how they move and stretch will give you insight into how expressions form and how skin stretches over bone. This anatomical knowledge is a cornerstone for any artist seeking to master realistic portraiture. By building this strong foundation, you set yourself up for success in capturing not just a likeness, but the very essence of a person. For more insights into artistic fundamentals, explore our comprehensive guide on drawing basics.

Mastering Light, Shadow, and Value for Three-Dimensional Form

Artistic portrait of a male with vibrant blue and pink lighting creating a moody atmosphere. Photo: Pho Tomass / Pexels
Once the foundational structure is in place, the next critical step in how to draw realistic portraits is to understand and manipulate light, shadow, and value. These elements are not merely decorative; they are the architects of form, transforming a flat drawing into a three-dimensional representation. Without accurate values, a portrait will appear flat, unconvincing, and lack the depth that defines realism. Begin by simplifying what you see into distinct areas of light and shadow. Squinting at your reference photo or subject can help you identify these major value masses, reducing complex details to their essential forms. This simplification is often called 'massing in' values. The concept of 'value' refers to the lightness or darkness of a tone, ranging from pure white to pure black. A full range of values is essential for creating convincing depth. Light areas (highlights) reveal the parts of the face directly struck by light, while dark areas (shadows) recede. But it's not just about light and dark; it's about the subtle gradations in between. These transitions, known as 'halftones,' are what create the illusion of curves and contours. Pay close attention to the 'core shadow,' the darkest part of a form, and the 'reflected light,' which bounces back into the shadow areas from surrounding surfaces, softening the edges and adding realism. Understanding the direction and intensity of your light source is paramount. A single, strong light source will create clear, defined shadow shapes, making it easier to render form. Multiple light sources, while more complex, can also be navigated with careful observation. Consider how light falls on different textures—smooth skin reflects light differently than textured hair or fabric. Practice drawing simple geometric forms like spheres and cubes under various lighting conditions to internalize how light behaves on three-dimensional objects. This exercise directly translates to the complex forms of the human face. By meticulously building up layers of graphite (or your chosen medium), gradually transitioning from light to dark, you will begin to sculpt the face on your paper, giving it volume, weight, and an undeniable sense of presence. This mastery of value is arguably the most powerful tool in your arsenal for achieving true realism.

Capturing Intricate Details: Eyes, Hair, and Skin Texture
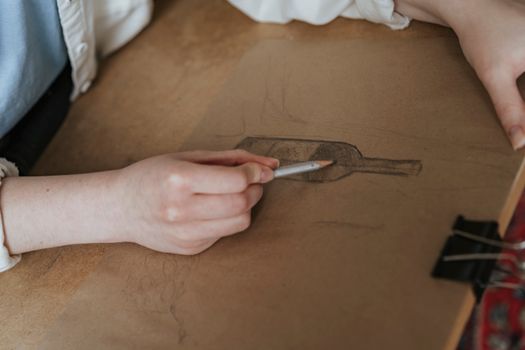
A person sketching a wine bottle on paper with a pencil. Artistic process in a creative setting. Photo: olia danilevich / Pexels
After establishing the overall form through anatomy and values, the focus shifts to the intricate details that breathe life into your realistic portraits. This stage is where many artists either excel or falter, as it requires both keen observation and precise execution. When drawing eyes, remember they are spheres nestled within sockets, not flat almond shapes. Pay attention to the subtle curves of the eyelids, the reflections on the cornea, and the delicate veins in the whites of the eyes. The iris and pupil are not simply circles; they possess depth and texture. The catchlight (the reflection of the light source) is crucial for making the eyes sparkle and appear alive. Without it, the eyes can look dull or lifeless. Observe how the eyelashes emerge from the lid, their varying lengths, and how they clump together. Hair, often considered one of the most challenging elements, should be approached as masses and flows, rather than individual strands. Start by blocking in the overall shape and direction of the hair, paying attention to how light hits it and creates highlights and shadows. Then, gradually introduce individual strands and textures, always following the natural flow of the hair. Avoid drawing every single hair; instead, suggest texture and volume through careful layering and variation in line weight. Different hair types—straight, curly, wavy—will require different approaches in rendering, but the principle of mass before detail remains constant. Skin texture is perhaps the most subtle and difficult detail to render realistically. The key is not to draw every pore or blemish, but to suggest the overall texture through careful blending and layering of values. Use smooth transitions for younger skin and introduce subtle variations in tone and very light, almost imperceptible textual marks for older skin. Avoid harsh lines; instead, build up tones gradually using light pressure and multiple layers. Tools like blending stumps, tortillons, or even cotton swabs can help achieve smooth skin tones. However, don't over-blend to the point of losing form. The interplay of soft edges for skin and sharper edges for features like the eyes or lips will create a convincing sense of realism. Remember, every wrinkle, freckle, or scar tells a story, and capturing these nuances with sensitivity adds immense character to your portrait. For advanced blending techniques, consider exploring advanced drawing techniques.

Capturing Emotion and Likeness: Tips for Expressive Portraits
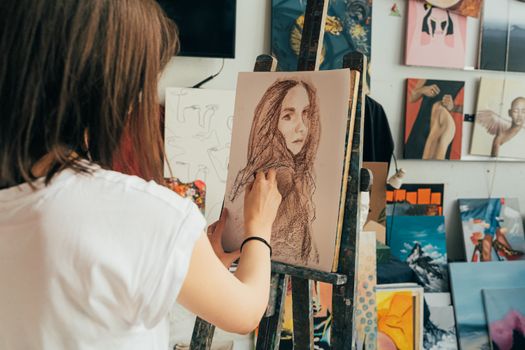
Woman drawing in an art studio surrounded by finished paintings and artworks. Photo: AI25.Studio Studio / Pexels
Moving beyond mere technical accuracy, the true artistry in how to draw realistic portraits lies in capturing the subject's unique likeness and conveying emotion. A technically perfect portrait that lacks soul will feel sterile. Likeness isn't just about getting the proportions right; it's about identifying and exaggerating (subtly) the unique characteristics that make an individual recognizable. Observe the specific curve of their smile, the tilt of their head, the way their eyebrows furrow, or the slight asymmetry in their features. These subtle nuances are often more important than perfect anatomical rendering in achieving a strong likeness. To convey emotion, focus on the 'action points' of the face: the eyes, eyebrows, and mouth. The eyes, often called the windows to the soul, are paramount. A slight adjustment in the angle of an eyelid or the size of a pupil can dramatically alter an expression. The eyebrows are incredibly expressive; their arch, furrow, or lift speaks volumes. The mouth, with its complex musculature, can convey everything from joy to sorrow with minute changes in its corners and the tension of the lips. Practice drawing these features in isolation with various expressions to understand their mechanics. Another crucial aspect is understanding the subject's personality. If possible, spend time with your subject or study multiple reference photos. What is their dominant expression? Are they often contemplative, jovial, or serene? Infuse these observations into your drawing. Don't be afraid to allow your own interpretation and artistic voice to come through, even in realistic work. The goal is not to be a human camera, but to create an artistic representation that resonates. Finally, consider the overall composition and background. A simple, uncluttered background often helps focus attention on the subject's face and expression. By combining technical skill with empathetic observation, you can create portraits that are not only realistic but also deeply moving and truly capture the spirit of the individual.

Comparison

FeatureGraphite PencilsCharcoalColored PencilsDigital Tablet
Control/PrecisionExcellentGoodVery GoodExcellent
Blending AbilityGoodExcellentModerateExcellent
ErasabilityHighModerateLowHigh
Texture RangeLimitedWideModerateInfinite
Learning CurveLowModerateModerateHigh

What Readers Say

"This guide completely transformed my approach to how to draw realistic portraits! The section on facial anatomy was a game-changer for getting proportions right. My portraits finally look like the people I'm drawing."

Sarah J. · Austin, TX

"I've struggled with realism for years, but the detailed explanation of light and shadow here was incredibly clear. My drawings now have so much more depth and form thanks to these techniques."

Mark D. · Seattle, WA

"Following the steps in this article, I was able to create my first truly realistic portrait of my grandmother. The tips on hair and skin texture made all the difference; it looks just like her!"

Emily R. · Boston, MA

"A very thorough and helpful resource. While some parts were a bit advanced for a beginner, the foundational information is invaluable. I appreciated the emphasis on observation over just technique."

David L. · Denver, CO

"As a digital artist, I found the principles of light, shadow, and anatomy equally applicable to my medium. This guide isn't just for traditional artists; it's a universal masterclass in how to draw realistic portraits."

Jessica T. · Miami, FL

Frequently Asked Questions

What's the most common mistake beginners make when trying to draw realistic portraits?

The most common mistake is rushing to details without first establishing accurate proportions and foundational forms. Many beginners focus on drawing individual features like eyes or lips perfectly, but if the underlying structure of the head is incorrect, the overall portrait will look distorted and unrealistic, regardless of how well the individual features are rendered.

Is it necessary to use expensive materials to draw realistic portraits?

Absolutely not. While high-quality materials can enhance the experience, you can achieve incredibly realistic results with very basic supplies. A set of graphite pencils (HB, 2B, 4B, 6B), a good eraser, blending stumps, and quality drawing paper are more than sufficient to start your journey into realistic portraiture. Skill and observation are far more important than the cost of your tools.

How can I improve my ability to capture a subject's likeness?

To improve likeness, focus on observing the unique characteristics and subtle asymmetries of your subject. Don't just draw what you think a face looks like; draw exactly what you see. Pay attention to the specific shape of their nose, the distance between their features, and their typical expressions. Practice with multiple reference photos of the same person from different angles. Regular practice and critical self-assessment are key.

How long does it take to learn how to draw realistic portraits?

Learning how to draw realistic portraits is a continuous journey, not a destination. While you can see significant improvement within a few months of consistent practice (e.g., 1-2 hours daily), mastering the craft can take years. It depends on your dedication, the quality of your practice, and your natural aptitude. Patience and persistence are your greatest allies.

What's the difference between realistic and hyperrealistic portraiture?

Realistic portraiture aims to create a convincing representation of a person, capturing their likeness and form. Hyperrealistic portraiture takes this a step further, striving for an almost photographic level of detail and precision, often exaggerating textures and light to create an intensified reality. While both aim for accuracy, hyperrealism pushes the boundaries of detail to an extreme, often making the artwork indistinguishable from a photograph at first glance.

Who should learn how to draw realistic portraits?

Anyone with a passion for art and a desire to capture the human form should learn how to draw realistic portraits. It's suitable for aspiring professional artists, hobbyists looking to deepen their skills, or anyone who simply finds joy in the challenge of creating lifelike representations. The skills learned are transferable to many other art forms.

Are there any health risks associated with drawing for long periods?

While drawing itself isn't inherently risky, prolonged periods of intense focus can lead to eye strain, neck pain, and carpal tunnel syndrome if proper ergonomics aren't maintained. Ensure you have good lighting, take regular breaks to stretch, maintain good posture, and use comfortable drawing tools. Listen to your body and adjust your setup as needed to prevent discomfort or injury.

What are the future trends in realistic portrait drawing?

Future trends in realistic portrait drawing are likely to see continued integration of digital tools, allowing for new textures, effects, and workflow efficiencies. There's also a growing interest in combining traditional realism with elements of surrealism or fantasy, pushing the boundaries of what 'realistic' can mean. Expect continued exploration of diverse subjects and narratives, reflecting a broader cultural landscape.

Embark on your artistic journey to master how to draw realistic portraits today. With consistent practice, keen observation, and the techniques outlined in this guide, you'll soon be creating stunning, lifelike artworks that capture the essence and emotion of your subjects. Start drawing, keep learning, and unlock your full potential as a portrait artist.

Topics: how to draw realistic portraitsportrait drawing techniquesrealistic art skillsfigure drawing faceshyperrealism art
Leo List

DK Escorts LU Escorts AT Escorts SE Escorts FI Escorts CH Escorts DE Escorts HR Escorts IE Escorts GR Escorts CZ Escorts NO Escorts BE Escorts FR Escorts SI Escorts IL Escorts NL Escorts PL Escorts HU Escorts ES Escorts IT Escorts PT Escorts SK Escorts RO Escorts ZA Escorts UY Escorts US Escorts UK Escorts NZ Escorts AU Escorts
Brampton weed
Adultwork EstrelaBet Vai de Bet R7 Bet Betão Galera Bet Rainbet Bet9ja Shop SportyBet BetKing Sisal Loto Foot Hollywoodbets YesPlay Odibets RushBet Jugabet BetWarrior BetCity MSport betPawa Fortebet