✓ No prior experience is necessary to start painting.
✓ Acrylics are often recommended for beginners due to their versatility and quick drying time.
✓ Focus on basic shapes, colors, and values before complex subjects.
✓ Practice consistently and embrace imperfections as part of the learning process.
How It Works
1
Gather Your Essential Supplies
Begin by acquiring a basic set of paints, brushes, and surfaces. This initial investment doesn't have to be expensive, but quality tools can enhance your experience.
2
Understand Color Theory Basics
Familiarize yourself with primary, secondary, and tertiary colors, and how they interact. This fundamental knowledge will dramatically improve your painting outcomes.
3
Practice Fundamental Techniques
Experiment with different brushstrokes, blending, and layering. Starting with simple exercises builds muscle memory and confidence before tackling complex projects.
4
Choose Simple Subjects to Start
Don't overwhelm yourself with intricate scenes. Begin with still life arrangements, simple landscapes, or abstract shapes to focus on technique rather than perfection.
Demystifying Beginner Painting Supplies: What You Really Need
Photo: Huy Nguyễn / Pexels
Embarking on your painting journey doesn't require a fortune spent on art supplies. In fact, one of the biggest misconceptions for beginners is that you need an elaborate setup to start. The truth is, a few key items will get you well on your way to creating beautiful art. Let's break down the essentials, focusing on practicality and value for money.
First and foremost, you'll need paints. For beginners, acrylic paints are almost universally recommended. Why acrylics? They are water-soluble, meaning they clean up easily with water, dry quickly, and are incredibly versatile. You can use them thinly like watercolors or thickly like oils. A basic starter set of acrylics typically includes primary colors (red, blue, yellow), black, and white. With these five colors, you can mix an astonishing array of hues. Don't be tempted by huge sets with dozens of colors; learning to mix your own colors is a fundamental skill that will serve you well. Brands like Liquitex Basics, Winsor & Newton Galeria, or Golden Heavy Body (a step up in quality) are excellent choices. Avoid craft store 'bargain' paints if possible, as their pigment concentration can be low, leading to dull colors and frustrating experiences.
Next up are brushes. Just like paints, you don't need a vast collection. A good starter set will include a few different shapes and sizes. Look for a flat brush (1/2 inch or 1 inch), a round brush (size 4 or 6), and a small detail brush (size 0 or 1). Synthetic brushes are ideal for acrylics as they are durable and hold their shape well. Natural hair brushes are often better suited for oils or watercolors. Investing in decent quality brushes will make a significant difference in your control and application. Cheap brushes can shed bristles, lose their shape quickly, and make smooth strokes difficult.
Beyond paints and brushes, you'll need surfaces to paint on. Canvas panels or stretched canvases are popular choices. Canvas panels are generally more affordable and great for practice. Small sizes (8x10 or 9x12 inches) are perfect for getting started. Alternatively, heavy-duty paper designed for acrylics (often labeled 'acrylic paper' or 'mixed media paper' with a weight of 140 lb/300 gsm or higher) is an even more economical option for initial experiments. Avoid thin printer paper, as it will buckle and bleed.
Other essential items include a palette (a simple plastic plate, a ceramic tile, or even parchment paper works perfectly), a water container (an old yogurt cup or jar is fine), and paper towels or a rag for cleaning brushes. An easel is optional; many beginners comfortably paint on a flat table surface. Lastly, consider a palette knife for mixing paints. It keeps your brushes cleaner and allows for interesting textures. Remember, the goal is to get started without overthinking or overspending. Once you begin painting, you'll naturally discover what tools you prefer and what you might want to add to your collection. Exploring different art forms can also broaden your understanding of tools.
Mastering Basic Techniques: Your First Strokes to Success
Photo: Huy Nguyễn / Pexels
Once you have your supplies, the real fun begins: learning how to use them! Don't jump straight into painting a masterpiece. Instead, dedicate time to understanding fundamental techniques. Think of it as learning scales before playing a symphony. These foundational skills will build your confidence and make your painting process much more enjoyable and effective.
Start with brush control. Hold your brush like a pencil, but perhaps a little further back for looser strokes, or closer to the ferrule (the metal part) for more control and detail. Experiment with different pressures: light pressure creates fine lines, while more pressure yields thicker lines. Practice making consistent lines, varying line thickness, and creating smooth curves. Try filling in simple shapes (squares, circles) with even color. This exercise helps you understand how much paint to load onto your brush and how to manage your brushstrokes.
Next, delve into color mixing, a crucial skill for any painter. As mentioned, start with your primary colors, plus black and white. Learn how to create secondary colors (orange, green, purple) by mixing two primaries. Then, experiment with mixing primaries and secondaries to create tertiary colors. White will lighten colors (creating tints), and black will darken them (creating shades). Adding a tiny amount of a complementary color can also mute or gray down a hue. Keep a small notebook or a dedicated sheet of paper to record your color mixes – this will become an invaluable reference. Understanding how colors interact and how to achieve specific hues is incredibly empowering.
Blending is another vital technique, especially with acrylics. Because acrylics dry quickly, blending requires a bit of speed. You can blend colors wet-on-wet by applying two colors next to each other and gently mixing their edges with a clean, damp brush. For smoother transitions, you might need to work in small sections or use a blending medium (a paint additive that slows drying time). Another common technique is layering, where you apply thin, semi-transparent coats of paint over dried layers. This allows you to build up color depth and subtle variations. Glazing, a form of layering with very thin, transparent paint, can add luminosity and richness.
Finally, don't underestimate the power of value. Value refers to the lightness or darkness of a color. A strong range of values (from dark to light) gives your painting depth and form. Practice creating a grayscale chart using just black and white, moving from pure white to pure black through several shades of gray. Then, try to apply this concept to a single color, creating various tints and shades. Understanding value will help you create three-dimensional effects and make your subjects pop. Remember, consistent practice of these basic techniques will lay a solid foundation for more complex artistic endeavors.
Your First Projects: From Still Life to Simple Landscapes
Photo: Tara Winstead / Pexels
With a basic understanding of supplies and techniques, it's time to put brush to canvas! Choosing your first projects can feel daunting, but the key is to start simple and allow yourself the freedom to experiment without the pressure of perfection. Think of these as learning exercises, not gallery pieces. This approach will foster growth and keep your artistic spirit alive. Discovering new art forms often starts with simple projects.
Still life is an excellent starting point for beginners. It allows you to control your subject matter, lighting, and composition. Begin by selecting a few simple objects from around your home. A single piece of fruit (like an apple or an orange), a mug, or a simple vase makes for a great subject. Arrange them on a plain surface, perhaps with a simple cloth as a backdrop. Pay attention to how the light hits the objects, creating highlights and shadows. Don't try to replicate every detail initially; focus on getting the basic shapes, colors, and values correct. Squinting your eyes can help you see the larger shapes and value differences more easily. Try painting the same object from different angles or with different lighting to observe how these changes affect its appearance. This exercise trains your eye to see and translate three-dimensional forms onto a two-dimensional surface.
Another fantastic beginner project is a simple landscape. You don't need to visit a picturesque mountain range; even looking out your window can provide inspiration. Focus on a very limited number of elements: a clear sky, a horizon line, a few simple trees, or a distant field. Break down the scene into basic shapes and colors. For instance, the sky might be a large rectangle of blue, the ground a rectangle of green/brown, and trees might start as simple oval or triangular shapes. Pay attention to atmospheric perspective – how objects further away appear lighter, less saturated, and less detailed. This helps create a sense of depth. Don't worry about intricate leaves or individual blades of grass; focus on capturing the overall impression and mood of the scene. Consider painting a simplified sunset or sunrise, which allows you to experiment with warm and cool colors and dramatic lighting.
Abstract painting can also be incredibly liberating for beginners. Without the pressure of realistic representation, you can focus purely on color, shape, line, and texture. Start by choosing a limited color palette (e.g., two or three colors plus white) and experiment with different brushstrokes, splatters, and layering. Explore how colors react when placed next to each other, how different textures can be created with various tools (not just brushes!), and how compositions can evoke different feelings. This approach encourages playfulness and helps you develop an intuitive understanding of your materials and personal style. Remember, the goal is to enjoy the process and learn from each stroke, not to achieve instant mastery. Every painting is a step forward in your artistic journey.
Common Pitfalls and How to Avoid Them: Tips for Your Artistic Growth
As you embark on your painting journey, you're bound to encounter challenges. This is a natural part of the learning process! Understanding common pitfalls and how to navigate them can save you frustration and accelerate your artistic growth. Embrace these as opportunities to learn and refine your craft.
One of the most frequent mistakes beginners make is trying to achieve perfection on their first attempt. This often leads to discouragement and giving up. Remember, painting is a skill developed over time, through practice and iteration. Instead of aiming for a flawless masterpiece, aim to learn something new with each painting. Focus on a specific technique, like blending colors or creating a certain texture. View each painting as an experiment rather than a final product. This shift in mindset can alleviate immense pressure.
Another common issue is using too little paint or too much water (especially with acrylics). Using too little paint results in patchy, streaky colors that lack vibrancy and coverage. Don't be afraid to load your brush! Conversely, adding too much water to acrylics can break down the binder, making the paint chalky, less adhesive, and difficult to layer. If you need to thin acrylics, use a dedicated acrylic medium or only a tiny amount of water. For watercolors, water is key, but understanding the right ratio comes with practice.
Neglecting to clean brushes properly is a quick way to ruin your tools. Dried paint, especially acrylic, can permanently damage bristles. Always clean your brushes thoroughly with water and mild soap immediately after use. Reshape the bristles and store them upright to prevent bending. Good tool maintenance not only prolongs the life of your brushes but also ensures they perform optimally when you're painting.
Many beginners also tend to overwork their paintings. This happens when you keep adding layers, blending, or adjusting details beyond what's necessary, often leading to muddy colors, lost freshness, and a cluttered appearance. Learn to recognize when a painting is 'done' or when it's time to step away. Sometimes, taking a break and returning with fresh eyes can reveal that less is indeed more. Trust your initial instincts and avoid endless tinkering.
Lastly, comparing your work to professional artists or experienced peers can be incredibly demotivating. Remember that everyone starts somewhere. Focus on your own progress and celebrate small victories. Instead of comparing, seek inspiration from others and understand that their journey has involved years of dedication. Your artistic voice is unique, and it will emerge as you continue to paint and explore. Stay curious, stay persistent, and most importantly, enjoy the process of creation.
Comparison
Feature
Acrylic Paints (Best for Beginners)
Oil Paints (Intermediate/Advanced)
Watercolor Paints (Requires Practice)
Drying Time
Fast
Slow
Fast (but re-wetting possible)
Cleanup
Water & Soap
Solvents (Turpentine/Mineral Spirits)
Water & Soap
Versatility
High (thick to thin)
Medium (thick, blendable)
High (transparent washes)
Cost (Starter Set)
Low to Medium
Medium to High
Low to Medium
Blending Difficulty
Medium (dries fast)
Easy (long open time)
Medium (wet-on-wet technique)
Opacity
Opaque (can be transparent)
Opaque
Transparent
What Readers Say
★★★★★
"This guide truly showed me how to start painting for beginners. I was intimidated before, but the step-by-step approach made it so accessible. My first still life actually looks like an apple!"
Sarah J. · Austin, TX
★★★★★
"I've always wanted to learn to paint, and this article was the perfect kickstart. The advice on supplies saved me money, and the technique tips were incredibly practical. Highly recommend for anyone curious about how to start painting for beginners."
Mark D. · Miami, FL
★★★★★
"After reading this, I bought a small acrylic set and painted for the first time in years. I completed two small abstract pieces, and I'm genuinely proud of them! This truly helped me understand how to start painting for beginners."
Emily R. · Seattle, WA
★★★★★
"The information on color mixing was particularly helpful, though I wish there were more visual examples. Still, a very solid resource for understanding how to start painting for beginners and getting going."
David L. · Chicago, IL
★★★★★
"As a busy mom, I needed something clear and concise to get into painting. This guide delivered! It clarified the initial steps and made me feel confident enough to pick up a brush. It's a fantastic resource for how to start painting for beginners."
Olivia P. · Denver, CO
Frequently Asked Questions
What is the easiest type of paint for beginners?
Acrylic paints are widely considered the easiest for beginners. They are water-soluble for easy cleanup, dry quickly allowing for layering, and are versatile enough to be used in various styles, from thin washes to thick impasto techniques. Their forgiving nature makes them ideal for learning.
Do I need artistic talent to start painting?
Absolutely not! Artistic talent is often misunderstood as an innate gift. While some may have a natural inclination, painting is primarily a skill that can be learned and developed through practice, patience, and proper guidance. Everyone can learn to paint, regardless of perceived talent.
How do I choose my first painting subject?
Start with simple subjects that intrigue you. Still life arrangements of one or two common objects (like fruit or a mug), simplified landscapes (a horizon line and a tree), or even abstract color explorations are excellent choices. The goal is to focus on technique and color, not complex details.
How much does it cost to start painting?
You can start painting for a surprisingly low cost. A basic beginner set of acrylic paints, a few brushes, and a pack of canvas panels or acrylic paper can be purchased for around $30-$50. As you progress, you can gradually invest in higher-quality or more specialized supplies.
Is painting with watercolors or oils better than acrylics for beginners?
While all mediums have their beauty, acrylics are generally recommended over watercolors or oils for beginners. Watercolors require a different approach to control water and pigment, while oils have a very long drying time and require solvents for cleanup. Acrylics offer a good balance of ease of use and versatility.
Who should consider learning how to start painting for beginners?
Anyone looking for a creative outlet, a new hobby, or a way to express themselves should consider learning how to paint. It's beneficial for stress relief, improving observation skills, and fostering a sense of accomplishment. Age and prior experience are irrelevant; curiosity is all you need.
Is painting a safe hobby?
Generally, painting is a very safe hobby. When using acrylics, cleanup is with water, and they are non-toxic. If you venture into oil paints, ensure good ventilation when using solvents. Always read product labels for safety information, especially regarding pigments or mediums, but for beginners, risks are minimal.
What are some emerging trends in beginner painting that I should be aware of?
While foundational techniques remain constant, there's a growing trend towards mindful and intuitive painting, focusing on the process over the product. Online tutorials and communities are also making learning more accessible than ever, and digital painting tools are increasingly popular for initial exploration before committing to physical mediums.
You now have the knowledge and confidence on how to start painting for beginners. Don't let hesitation hold you back any longer. Grab your supplies, find a quiet space, and allow your creativity to flow freely onto the canvas. The world of painting awaits your unique touch!

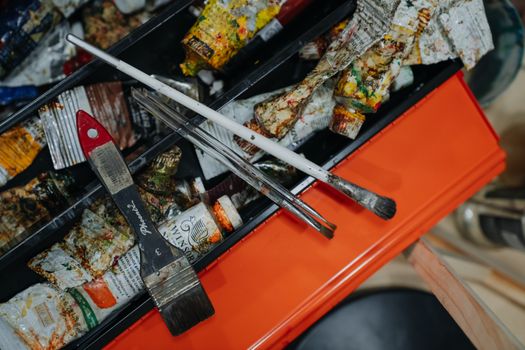 Photo: Huy Nguyễn / Pexels
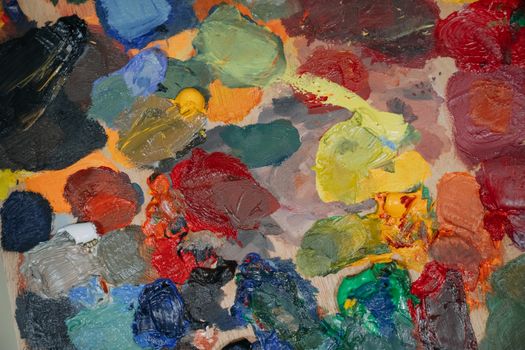 Photo: Huy Nguyễn / Pexels
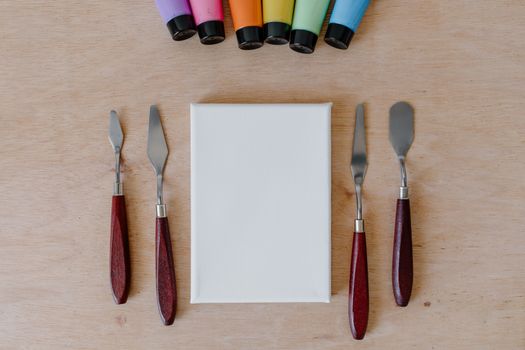 Photo: Tara Winstead / Pexels